
Basic Navigation
LoopLink RLC will adapt its layout to your screen size. This enables you to more easily access and modify your projects on a wide range of devices and screen sizes. On smaller screens, a tray of buttons will be available at the bottom of the screen allowing you to toggle between the Main Page and Navigation sections of the screen.
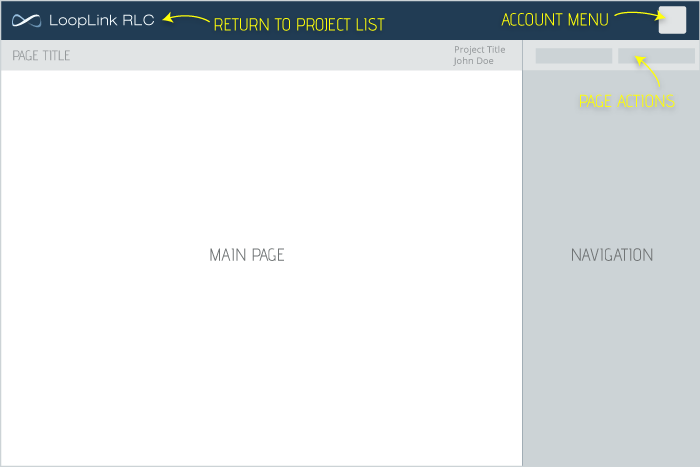
Return to Project List
Regardless of your screen size, the logo at the top of your page will return you to your Project List.
Account Menu
The Account Badge is located to the right of the logo in the page header. Clicking on the badge will open the Account Menu allowing access to:
- Your Project List
- Account Settings
- Log Out
Project List
The project list is a table of all of the projects you have created within LoopLink RLC. By default, the table is sorted in order of most recently modified.
Create New Project
Click the Create New Project button found in the top right of your screen to start a new project.
Project Actions
Opening Projects
Click on the name of any project in your list to open the project.
Print Project Report
Click  to directly go to the Project Summary page. This allows you to quickly generate a pdf report for your project. If you are unable to click on the report link, your project is not able to printed due to errors or a lack of zones/hot water.
Duplicate Project
Click  to create an exact copy of a project. The copied project will open to the Project Details page. The new project will be automatically renamed.
Delete Project
Click  to permanently delete a project. You will be asked to confirm that you would like to delete the project prior to any action being taken.
Table Actions
Sorting Projects
Reorder your project list by clicking on the table header corresponding to the property you would like to sort by.
Finding Projects
Search for a specific project by name of project or the name of customer.